Once the company email integration is completed, users can connect their emails to Quotiss.
If you use Office365, please follow these steps:
1) Open your profile and go to the 'E-mail integration' tab.
2) Click 'Enable email integration'
3) Select Office365 from the dropdown and click Login button:
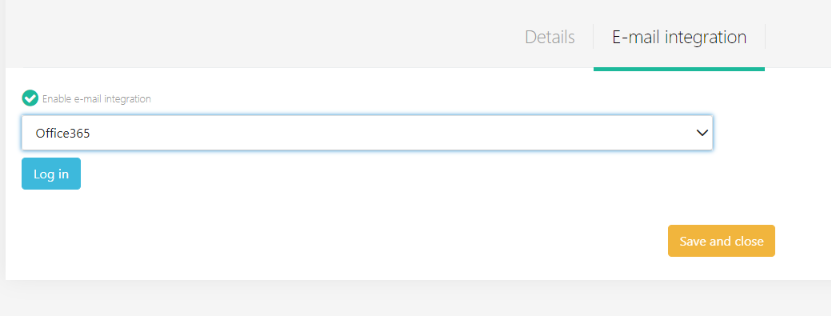
4) and login to your Office365 account.
Click 'Save and Close' once done. Your quotes will go out from your business email address now, and you can reply directly to your customer emails.
If you use Gmail or any other email server:
1) Open your profile and go to the 'E-mail integration' tab.
2) Click 'Enable email integration'
3) Select SMTP from the dropdown:
4) Update E-mail username (the way it is updated in your email client, usually same as email address)
5) Add your email password (not Quotiss password - this should be the password you use to login to your email, can be your general Windows password).
NB: Ensure that your password doesn't contain any special symbols, only English letters and numbers)

6) Click the 'Test Integration' button and wait for the system to establish the connection.
7) Select the folder where you'd like to store the emails sent from Quotiss (for example, 'Sent Items')
NB: If the folder selection is not active, it could only mean one thing – your login/password that you’ve provided doesn't match.
Click 'Save and Close' once done. Your quotes will go out from your business email address now, and you can reply directly to your customer emails.